There's something so comforting about a warm, hearty meal that requires minimal effort. Stuffed bell peppers are a classic for a reason – they're delicious, versatile, and packed with nutrients. But sometimes, the thought of pre-cooking rice and browning ground beef can feel like a chore. That's where the magic of the slow cooker comes in. Let's explore how to make unbelievably delicious and easy Crock Pot Stuffed Bell Peppers that practically cook themselves! Delicious and Easy Recipe for Crock Pot Stuffed Bell Peppers This recipe for Crock Pot Stuffed Bell Peppers is a game-changer for busy weeknights or lazy weekends. It simplifies the process without sacrificing any of the flavor. The slow cooker allows the flavors to meld together beautifully, resulting in tender peppers and a savory, satisfying filling. Plus, clean-up is a breeze! It's also a very forgiving dish, so feel free to adjust the ingredients to your liking. Got leftove...
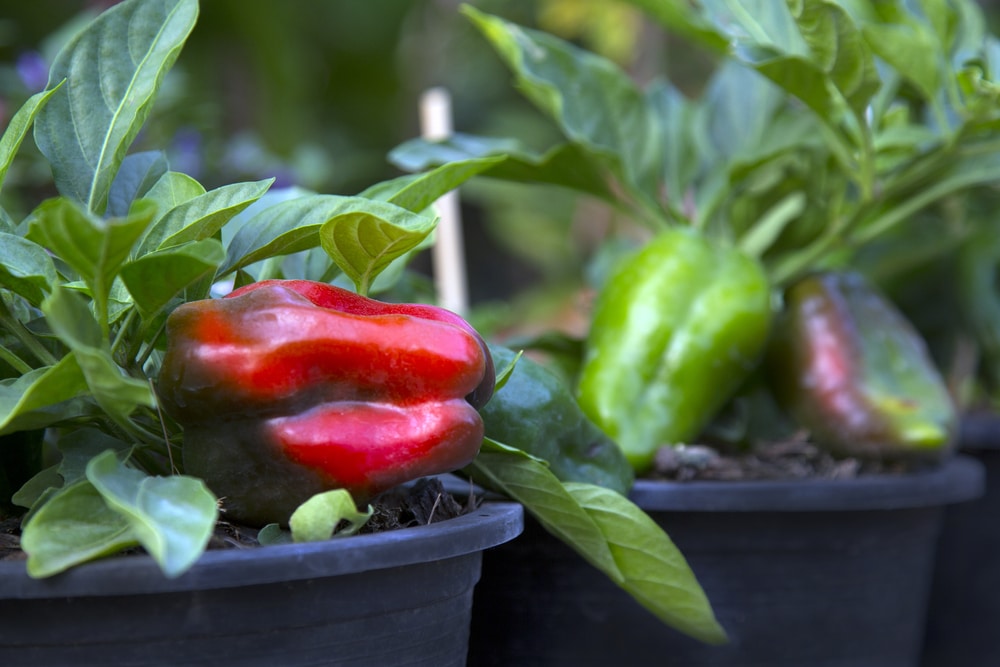
Imagine biting into a juicy, homegrown bell pepper, bursting with flavor, fresh from your own patio. Sounds idyllic, right? You don't need acres of land to make this dream a reality. Growing bell peppers in pots is totally achievable, even if you only have a small balcony or a sunny windowsill. Let's dive into the secrets of cultivating these colorful vegetables in containers!
Getting Started with Container Bell Peppers
Growing bell peppers in pots opens up a world of possibilities, allowing anyone to enjoy the taste of homegrown produce, regardless of space constraints. Before you even think about seeds, there are a few essential factors to consider to ensure your bell pepper plants thrive in their containers.
Choosing the Right Bell Pepper Variety for Pots
Not all bell pepper varieties are created equal when it comes to container gardening. Some are naturally more compact and better suited for smaller spaces. Choosing the right variety is crucial for success. Here's what to look for:
- Compact Varieties: Look for words like "compact," "dwarf," or "patio" in the variety name. These peppers are bred to stay smaller, making them ideal for pots. Examples include 'Patio Baby', 'Lunchbox', and 'Mini Bell'.
- Early Maturing Varieties: Opt for varieties that mature quickly. This is especially important in cooler climates, as it gives your peppers a better chance of ripening before the end of the growing season.
- Disease Resistance: Choose varieties known for their resistance to common pepper diseases like blossom end rot and tobacco mosaic virus. This will save you headaches down the road.
Here's a table comparing a few popular bell pepper varieties for container gardening:
| Variety | Size | Days to Maturity | Color | Notes |
|---|---|---|---|---|
| 'Patio Baby' | Compact (12-18 inches) | 50-60 days | Red | Excellent for small spaces, prolific producer. |
| 'Lunchbox' | Compact (18-24 inches) | 70-75 days | Various (Red, Yellow, Orange) | Sweet and flavorful, great for snacking. |
| 'California Wonder' | Standard (24-36 inches) | 75 days | Green (turns red) | A classic bell pepper, requires a larger pot. |
Selecting the Perfect Pot for Growing Bell Peppers
The size and type of pot you choose will significantly impact your pepper plant's growth. A pot that's too small will restrict root development, leading to stunted growth and fewer peppers. Here's what to consider:
- Size Matters: A minimum of 5 gallons is recommended for most bell pepper varieties. Larger varieties like 'California Wonder' will benefit from a 10-gallon pot or larger.
- Drainage is Key: Ensure your pot has ample drainage holes. Peppers don't like sitting in soggy soil, which can lead to root rot.
- Material Options: Terracotta, plastic, and fabric pots are all viable options. Terracotta pots are porous, which helps with drainage and aeration, but they can dry out quickly. Plastic pots retain moisture better but can overheat in direct sunlight. Fabric pots are a great option because they provide excellent drainage and aeration while also being lightweight.
The Right Soil Mix for Healthy Bell Peppers in Pots
Bell peppers need a well-draining, nutrient-rich soil mix to thrive in containers. Avoid using garden soil, as it tends to compact and doesn't provide adequate drainage. Here's a recipe for a fantastic potting mix:
- 1 part peat moss or coco coir: These materials help retain moisture and provide good aeration.
- 1 part perlite or vermiculite: These improve drainage and aeration.
- 1 part compost: Compost provides essential nutrients and beneficial microbes.
- Optional: Add a slow-release fertilizer to provide a steady supply of nutrients throughout the growing season.
You can also purchase a high-quality potting mix specifically formulated for vegetables at your local garden center. Just make sure it's well-draining and contains sufficient nutrients.
Speaking of garden care, having the right tools is essential for success. A durable and versatile option is the Garden Hose with a 10-Function Nozzle, featuring leak-proof metal connectors and a kink-free design, making watering your potted peppers a breeze. Find this wear-resistant metal hose here: https://amzn.to/3Yv E0Bo.
Planting and Caring for Your Potted Bell Peppers
Once you have your pot, soil, and bell pepper seedlings (or seeds), it's time to get planting! Proper planting and ongoing care are essential for maximizing your pepper harvest.
Starting from Seed vs. Seedlings
You have two options when starting your bell pepper journey: starting from seed or buying seedlings. Both have their advantages and disadvantages.
- Starting from Seed: This gives you more control over the variety and can be more economical. However, it requires more time and effort, as you'll need to start the seeds indoors 6-8 weeks before the last expected frost. Peppers need warm temperatures (70-80°F) to germinate.
- Buying Seedlings: This is a quicker and easier option, especially for beginners. You can find a wide variety of bell pepper seedlings at garden centers and nurseries. Choose healthy-looking plants with strong stems and no signs of pests or diseases.
Planting Your Bell Peppers
Whether you're planting seedlings or transplanting your own starts, follow these steps for optimal results:
- Fill the pot: Fill your chosen pot with the prepared potting mix, leaving about an inch or two of space at the top.
- Create a hole: Dig a hole in the center of the pot large enough to accommodate the root ball of your seedling.
- Gently remove the seedling: Carefully remove the seedling from its container, being careful not to damage the roots. Gently loosen the roots if they are tightly bound.
- Place the seedling: Place the seedling in the hole, ensuring that the top of the root ball is level with the soil surface.
- Fill and water: Fill the hole with potting mix and gently pat it down. Water thoroughly until water drains from the bottom of the pot.
Providing the Right Environment for Potted Bell Peppers
Bell peppers need a specific environment to thrive. Replicating their ideal conditions as closely as possible is key to a bountiful harvest.
Sunlight
Bell peppers are sun-loving plants and need at least 6-8 hours of direct sunlight per day. Place your pots in the sunniest spot in your yard or on your balcony. If you don't have enough sunlight, you may need to supplement with grow lights.
Watering
Water your bell peppers deeply and regularly, especially during hot, dry weather. Allow the top inch of soil to dry out between waterings. Avoid overwatering, as this can lead to root rot. A good rule of thumb is to water when the top inch of soil feels dry to the touch.
Fertilizing
Bell peppers are heavy feeders and need regular fertilization to produce a good crop. Use a balanced fertilizer (e.g., 10-10-10) every 2-3 weeks. You can also use organic fertilizers like compost tea or fish emulsion. Follow the instructions on the fertilizer package carefully.
Support
As your bell pepper plants grow, they may need support to prevent them from falling over, especially when they are laden with fruit. Use stakes or cages to support the plants and keep the peppers off the ground.
Troubleshooting Common Problems
Even with the best care, you may encounter some problems when growing bell peppers in pots. Here are some common issues and how to address them:
- Blossom End Rot: This is caused by a calcium deficiency and is characterized by a dark, leathery spot on the bottom of the pepper. To prevent blossom end rot, ensure your soil is rich in calcium and water your plants regularly. You can also add calcium to the soil by mixing in crushed eggshells or bone meal.
- Aphids: These tiny insects can suck the sap from your pepper plants, causing them to weaken and become distorted. Control aphids by spraying your plants with insecticidal soap or neem oil.
- Powdery Mildew: This fungal disease appears as a white, powdery coating on the leaves. Improve air circulation around your plants and spray them with a fungicide.
- Sunscald: This occurs when peppers are exposed to too much direct sunlight, causing them to develop white or yellow patches. Provide shade during the hottest part of the day or use shade cloth.
Harvesting and Enjoying Your Homegrown Bell Peppers
Harvesting your own bell peppers is the ultimate reward for your efforts! Here's how to know when your peppers are ready to pick:
- Color: Bell peppers are typically harvested when they have reached their mature color (e.g., green, red, yellow, orange). However, you can also harvest green bell peppers before they fully ripen.
- Size: The size of the pepper will vary depending on the variety. Check the seed packet or plant tag for information on the expected size.
- Firmness: The pepper should be firm to the touch.
To harvest, use a sharp knife or pruning shears to cut the pepper from the plant, leaving a small stem attached. Store your harvested bell peppers in the refrigerator for up to a week.
There's nothing quite like the taste of a freshly picked, homegrown bell pepper. Enjoy them raw in salads, grilled, stuffed, or added to your favorite dishes. Happy growing!