There's something so comforting about a warm, hearty meal that requires minimal effort. Stuffed bell peppers are a classic for a reason – they're delicious, versatile, and packed with nutrients. But sometimes, the thought of pre-cooking rice and browning ground beef can feel like a chore. That's where the magic of the slow cooker comes in. Let's explore how to make unbelievably delicious and easy Crock Pot Stuffed Bell Peppers that practically cook themselves! Delicious and Easy Recipe for Crock Pot Stuffed Bell Peppers This recipe for Crock Pot Stuffed Bell Peppers is a game-changer for busy weeknights or lazy weekends. It simplifies the process without sacrificing any of the flavor. The slow cooker allows the flavors to meld together beautifully, resulting in tender peppers and a savory, satisfying filling. Plus, clean-up is a breeze! It's also a very forgiving dish, so feel free to adjust the ingredients to your liking. Got leftove...
Have you ever wondered what it takes to transform a tiny bell pepper seed into a vibrant, colorful fruit bursting with flavor? The journey is a fascinating one, filled with distinct bell peppers growing stages that require specific care and attention. Let's dig in and explore this process from seed to harvest!
Understanding the Bell Pepper Growing Stages
Growing bell peppers can be incredibly rewarding, but understanding the different bell peppers growing stages is key to success. Each stage presents unique challenges and opportunities to nurture your plants for optimal growth and yield. We'll break down each stage, from germination to ripening, offering insights and tips to help you along the way.
Stage 1: Germination - The Beginning of Life
Germination is the initial stage where the bell pepper seed awakens from its dormancy and begins to sprout. This stage is crucial, as a strong start here sets the foundation for a healthy plant later on. The germination process is influenced by factors like temperature, moisture, and the quality of the seed itself.
Key Factors for Successful Germination:
- Temperature: Bell pepper seeds germinate best in warm temperatures, ideally between 75°F and 85°F (24°C to 29°C).
- Moisture: Consistent moisture is vital. The soil should be consistently damp, but not waterlogged. Overwatering can lead to seed rot.
- Seed Quality: Use high-quality seeds from a reputable source. Older seeds may have a lower germination rate.
- Light: While light isn't essential for germination itself, providing indirect light once the seedlings emerge is crucial.
You can start bell pepper seeds indoors about 6-8 weeks before the last expected frost in your area. Using a seed-starting mix in seedling trays or small pots is recommended. Cover the seeds lightly with soil and keep them consistently moist. Germination typically takes 7-14 days under optimal conditions.
Stage 2: Seedling Stage - Tender Beginnings
Once the seeds sprout and the first true leaves appear, your bell peppers enter the seedling stage. This is a delicate phase where the young plants are vulnerable to environmental stressors. Careful attention to their needs is crucial for their survival and healthy development.
Essential Care for Seedlings:
- Light: Seedlings require ample light to grow strong and prevent them from becoming leggy (tall and weak). If you're growing them indoors, provide artificial light using grow lights or fluorescent lamps. Ensure they receive at least 14-16 hours of light per day.
- Watering: Water seedlings gently and regularly, allowing the soil surface to dry slightly between waterings. Avoid overwatering, as this can lead to damping-off, a fungal disease that can kill young seedlings.
- Fertilizing: Start feeding your seedlings with a diluted liquid fertilizer formulated for seedlings once they have developed their first set of true leaves. Follow the instructions on the fertilizer package carefully.
- Air Circulation: Good air circulation helps prevent fungal diseases. Use a small fan to gently circulate the air around your seedlings.
Transplanting seedlings too early can shock them, so wait until all danger of frost has passed and the soil has warmed up. Gradually acclimate your seedlings to outdoor conditions by hardening them off. This involves exposing them to increasing periods of sunlight and cooler temperatures over a week or two. This process reduces transplant shock and prepares them for life in the garden.
Stage 3: Vegetative Growth - Building a Strong Foundation
The vegetative growth stage is characterized by rapid growth of the plant's stems, leaves, and root system. This stage focuses on building a strong foundation for future fruit production. During this phase, the plant requires plenty of nutrients, water, and sunlight.
Supporting Vigorous Vegetative Growth:
- Sunlight: Bell peppers need at least 6-8 hours of direct sunlight per day to thrive. Choose a sunny location in your garden with well-draining soil.
- Watering: Water deeply and regularly, especially during hot and dry weather. Aim to keep the soil consistently moist, but not waterlogged. A good rule of thumb is to water when the top inch of soil feels dry to the touch.
- Fertilizing: Continue fertilizing your bell peppers with a balanced fertilizer that contains nitrogen, phosphorus, and potassium. Nitrogen promotes leafy growth, while phosphorus and potassium support root development and flower formation.
- Support: As your bell pepper plants grow taller, they may need support to prevent them from toppling over. Use stakes or cages to provide support.
- Pruning: Pruning is optional, but it can help improve air circulation and sunlight penetration. Remove any suckers (small shoots that grow from the base of the plant) to encourage the plant to focus its energy on fruit production.
Weed control is also important during this stage. Weeds compete with your bell pepper plants for nutrients, water, and sunlight. Regularly weed your garden beds to keep them free of weeds. Mulching around your plants can help suppress weed growth and retain soil moisture.
Stage 4: Flowering and Pollination - The Promise of Fruit
The flowering stage marks the beginning of fruit production. Small, white flowers emerge from the nodes of the plant, signaling the potential for delicious bell peppers to come. Successful pollination is essential for fruit set, which is the development of fruit after fertilization.
Ensuring Successful Pollination:
- Pollinators: Bell peppers are self-pollinating, meaning they can be pollinated by their own pollen. However, pollinators like bees and wind can help improve pollination rates.
- Hand Pollination: If you're growing bell peppers indoors or in an area with limited pollinators, you may need to hand-pollinate the flowers. Gently shake the plant or use a small paintbrush to transfer pollen from one flower to another.
- Environmental Factors: Extreme temperatures (especially hot weather) and high humidity can negatively impact pollination. Provide shade during the hottest part of the day and ensure good air circulation to reduce humidity.
After pollination, the petals of the flowers will fall off, and small green fruit will start to develop. Protect the developing fruit from pests and diseases. Regular inspections of your plants are important. Look for signs of pests or diseases and take action promptly to prevent them from spreading.
Stage 5: Fruit Development - Growing Towards Maturity
Once the fruit sets, the bell peppers growing stages enter the fruit development phase. This is when the small green fruit begins to grow and mature. The size and color of the bell peppers will change as they ripen. This phase requires continued attention to watering, fertilizing, and pest control.
Guiding Fruit to Full Maturity:
- Watering: Consistent watering is critical during fruit development to prevent blossom-end rot, a condition caused by calcium deficiency due to fluctuating moisture levels.
- Fertilizing: Continue fertilizing your bell peppers with a fertilizer that is higher in phosphorus and potassium than nitrogen. These nutrients support fruit development and ripening.
- Pest and Disease Control: Monitor your plants regularly for pests and diseases. Common pests of bell peppers include aphids, flea beetles, and pepper weevils. Diseases like powdery mildew and bacterial leaf spot can also affect bell peppers. Use appropriate pest control measures and disease control strategies to protect your plants.
- Sun Scald Prevention: In hot climates, bell peppers can be susceptible to sun scald, which is damage to the fruit caused by excessive sun exposure. Provide shade during the hottest part of the day to prevent sun scald.
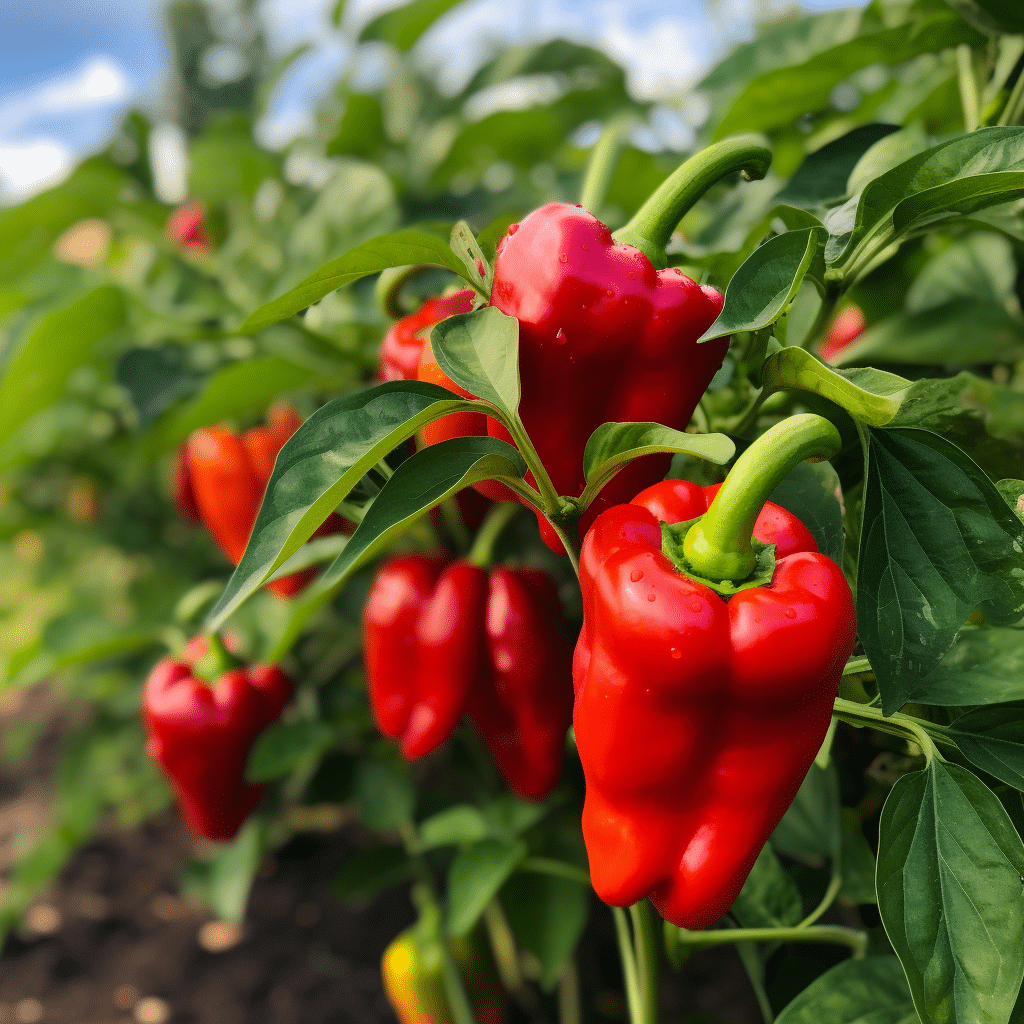
The time it takes for bell peppers to ripen depends on the variety and environmental conditions. Green bell peppers are typically ready to harvest in about 60-70 days after transplanting, while colored bell peppers (red, yellow, orange) may take 75-85 days. A fully mature bell pepper should be firm, glossy, and have a vibrant color.
Stage 6: Harvesting and Enjoying the Fruits of Your Labor
Harvesting is the final stage in the bell pepper growing stages. It's the culmination of all your hard work and dedication. Knowing when and how to harvest your bell peppers is important for ensuring the best flavor and quality.
Tips for a Successful Harvest:
- Timing: Harvest bell peppers when they have reached their mature size and color. Green bell peppers can be harvested when they are firm and fully sized, while colored bell peppers should be allowed to ripen fully on the plant for the sweetest flavor.
- Technique: Use a sharp knife or pruning shears to cut the bell pepper from the plant, leaving a short stem attached. Avoid pulling the fruit off the plant, as this can damage the plant.
- Storage: Store harvested bell peppers in the refrigerator for up to a week. For longer storage, you can freeze them after blanching them for a few minutes.
Bell peppers can be enjoyed in a variety of dishes, from salads and stir-fries to stuffed peppers and roasted vegetables. Their versatility and delicious flavor make them a popular addition to any garden.
To keep your garden flourishing and your bell peppers well-hydrated throughout all these stages, consider using a reliable watering solution. This75 FT Garden Hosewith its 10-function nozzle and leak-proof metal connectors ensures your plants receive the consistent hydration they need. Its kink-free, lightweight design makes gardening a breeze! You can find it here: https://amzn.to/3Yv E0Bo. Investing in a high-qualitywatering hose for your gardencan really make a difference.
Troubleshooting Common Bell Pepper Growing Problems
Even with the best care, bell pepper growers may encounter challenges. Knowing how to identify and address common problems can help ensure a successful harvest. Here's a quick look at some frequent issues:
Common Issues and Solutions:
- Blossom-End Rot: Caused by calcium deficiency. Ensure consistent watering and soil p H between 6.0 and
6.8. Add calcium to the soil if necessary.
- Aphids: Small, sap-sucking insects that can weaken plants. Spray plants with insecticidal soap or neem oil.
- Pepper Weevils: Small beetles that bore into the fruit. Use traps or insecticides to control them.
- Sun Scald: Damage to fruit caused by excessive sun exposure. Provide shade during the hottest part of the day.
- Viral Diseases: Viruses can cause stunted growth and distorted leaves. Remove and destroy infected plants. Use disease-resistant varieties.
By understanding the bell peppers growing stages and being prepared to address common problems, you can increase your chances of a successful bell pepper harvest. Happy gardening!